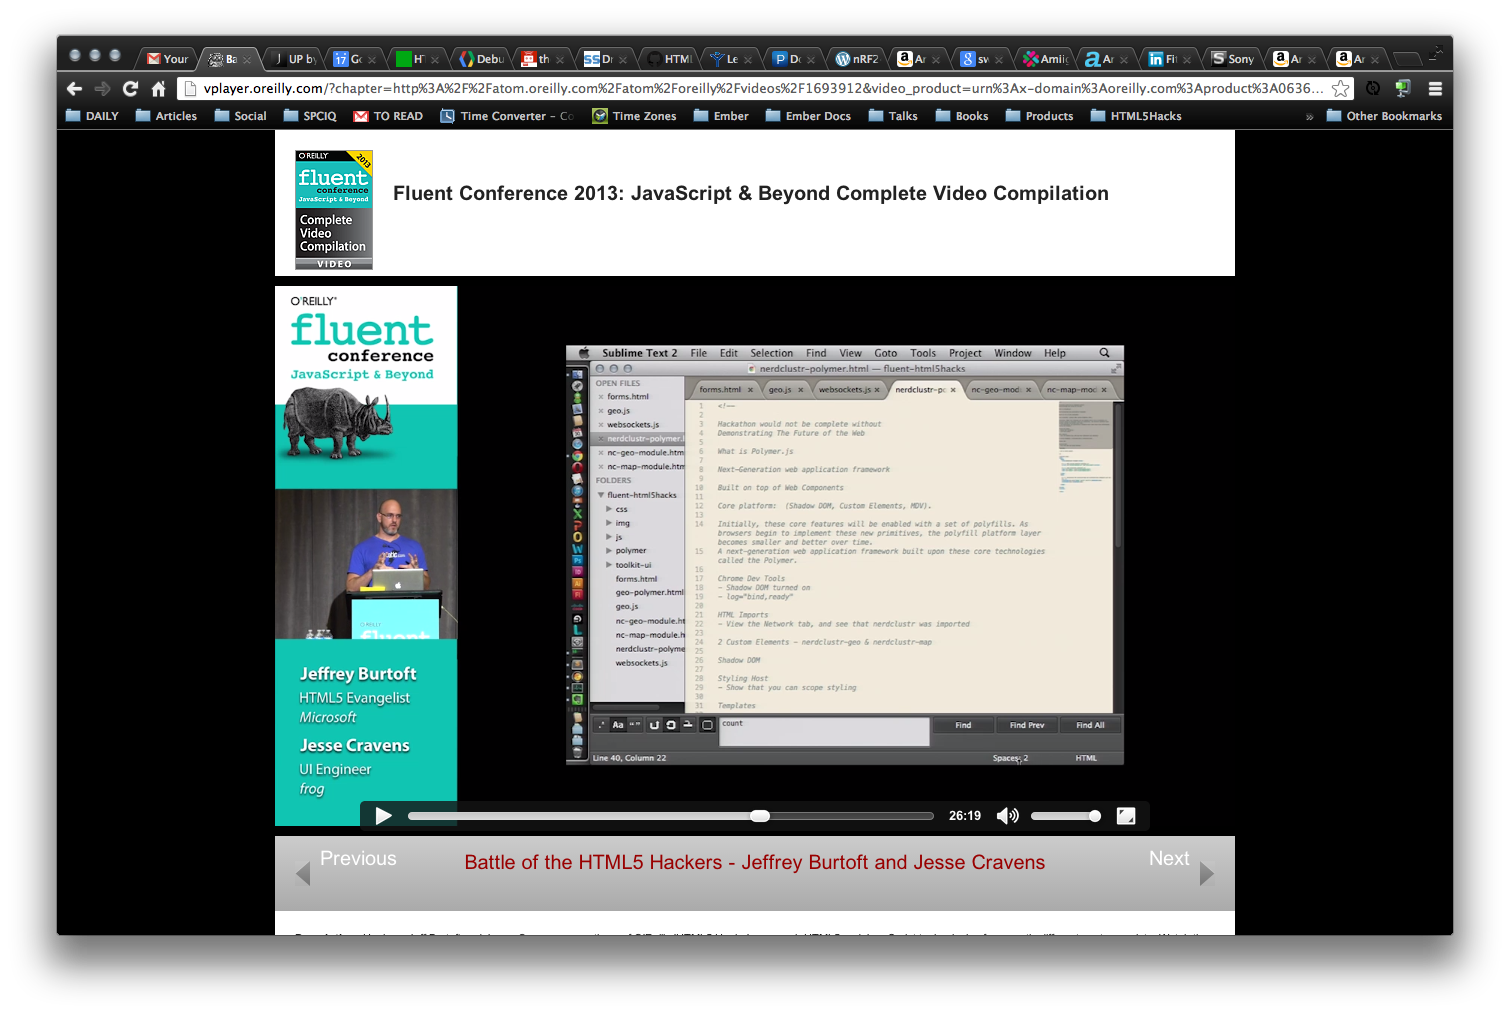
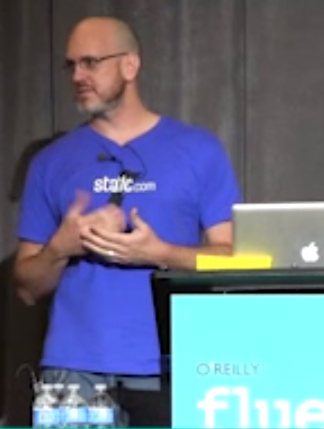
Our presentation at Fluent Conference 2013 was a success, as Jeff and I delivered our final version of the ‘Battle of the Hackers’ series.
If you missed the conference, you can still catch every workshop, session, and keynote with the complete video compilation of the event.Catch up with this year’s lineup of speakers—seasoned pros as well as notable newcomers—as they share their expertise with JavaScript, HTML5, CSS, and related technologies that power the Web.
It was a great pleasure to share the stage with Brendan Eich (Mozilla), Paul Irish (Google), Lea Verou (W3C), Bill Scott (PayPal), Jesse Freeman (Microsoft), Dion Almaer (Walmart.com), and dozens more in the field.
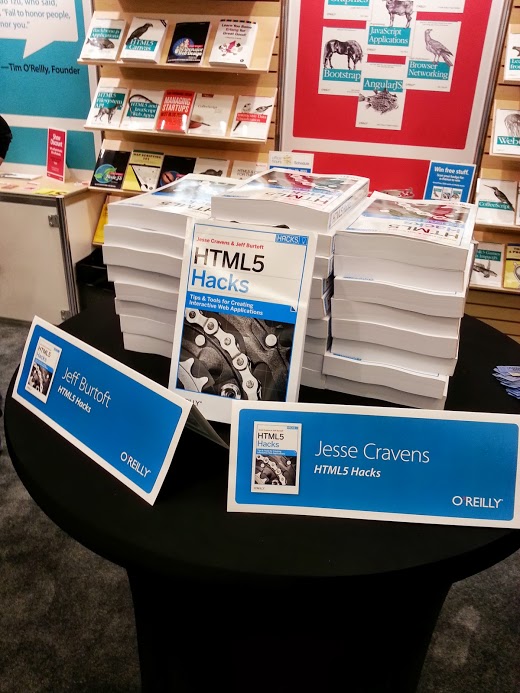
We also had a great turn out for the book signing, thanks for all the support. And congrats to Doug Hall for winning a free ebook copy of our book HTML5 Hacks
I also added a few more new hacks, involoving Web Components (Shadow DOM, HTML Imports, Custom Elements) and Polymer.js. You can find that source code available here: github.com/html5hacks/fluent2013-html5hacks
It’s been alot of fun co-presenting with Jeff, but my next two sessions, I will be going at HTML5 Hacking solo. You can catch my next presentations in NYC on July 24th–25th at Devcon5 2013 NYC or November 4th–8th at Øredev 2013.
This is an exploration of Handlebars.js template library when used with Ember.js views. Many of the Handlebars.js tutorials on the web discuss the Handlebars API, but not in the specific context of using Handlebars with Ember.js. In addition to filling that void, I’ll also give a brief background of JavaScript templating in general to provide perspective as to the problems it is solving.
This tutorial will be divided into two parts. In Part 1, you should gain a clear understanding of JavaScript templates, the capabilities of Handlebars expressions and helpers, and how to write your own Handlebars helpers.
The following tutorial will provide an overview for building Ember.js applications with Yeoman. Keep in mind, Yeoman is a framework agnostic collection of tools, used to manage the workflow of any JavaScript application or plugin. For the sake of this tutorial, we have chosen to focus on Ember.js, as a case study.
Our workflow would not be complete without also setting up our testing strategy, so we will also include a standard BDD (Behavior Driven Development) setup with the Mocha testing framework.
Created by Opera, Server Sent Events standardizes Comet technologies. The standard intends to enable native real time updates through a simple JavaScript API called EventSource, which connects to servers that asynchronously push data updates to clients via HTTP Streaming. Server Sent Events use a single, unidirectional, persistent connection between the browser and the server.
Unlike the Web Socket API, Server Sent Events and EventSource object use HTTP to enable real-time server push capabilities within your application. HTTP Streaming predates the WebSocket API, and it is often referred to as Comet or server push. The exciting part here is that the Server Sent Events API intends to standardize the Comet technique, making it trivial to implement in the browser.
What is HTTP Streaming?
In a standard HTTP request and response between a web browser and a web server, the server will close the connection once it has completed the processing of the request. HTTP streaming, or Comet, differs in that the server maintains a persistent, open connection with the browser.
It is important to note that not all web servers are capable of streaming. Only evented servers such as Node.js, Tornado, or Thin are equipped incorporate an event loop that is optimal for supporting HTTP streaming. These, non-blocking servers handle persistent connections from a large number of concurrent requests very well.
A complete discussion on evented vs. threaded servers is out of scope for this post, but that being said, in the upcoming hack we will provide a very simple evented server implementation example to get you started. We provide a simple browser based JavaScript to connect to the server, and a server side implementation using Ruby, Thin, and Sinatra.
For the record, this is also very easy to do with Node.js.
The Sinatra documentation describes itself as a “DSL for quickly creating web applications in Ruby with minimal effort.”
This text has focused primarily on Node.js (HTTP Server) and Express.js (web application framework) to quickly generate server side implementations for hacking out functionality.
It would a disservice to not mention Ruby, Rails and Sinatra in the same or similar light as we have Node.js in this text. Although learning Ruby is another learning curve, in the larger scheme of programming languages it is a less daunting curve than most. And as most die-hard Rubyists will preach, it is arguably the most elegant and fun to write of all modern programming languages. Ruby on Rails, and its little brother Sinatra are also great web application frameworks to start with if you are new to web application development.
Much like Node.js and Express, Sinatra makes building small server implementations nearly trivial. So for the context of HTML5 Hacks, that allows us to focus our efforts on programming in the browser.
For now let’s build a simple HTTP Streaming server using Sinatra.
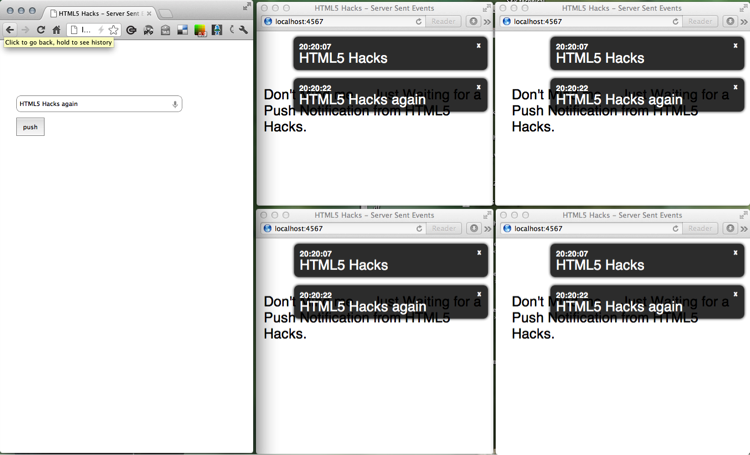
Our goal in the next hack is to build a simple streaming server and use the EventSource object to open a persistent connection from the browser. We will then push notifcations from one ‘admin’ browser to all the connected receivers. Sounds simple, right? Let’s get started.
A Simple HTTP Streaming Server
Open up a file and name it stream.rb. Then add the following:
Simple requiring of Sinatra and the JSON library:
stream.rb
12
require'json'require'sinatra'
Then, we set up a public folder, and set the server to use the evented ruby server, Thin.
Set up two routs for serving our 2 pages: index and admin. We will use Erb as our templating language. The details are out of scope, but our use is very minimal. More on Erb here: http://ruby-doc.org/stdlib-1.9.3/libdoc/erb/rdoc/ERB.html
stream.rb
1234567
get'/'doerb:indexendget'/admin'doerb:adminend
We’d like to timestamp each notification, so here is a very simple function definition.
stream.rb
123
deftimestampTime.now.strftime("%H:%M:%S")end
We also set up two empty arrays: one to hold the connections and the other to hold out notifications.
stream.rb
12
connections=[]notifications=[]
Now, for the routes. When our browser loads it s page, we have JavaScript running which will use the EventSource object to connect to a url here: http://localhost:4567/connect.
More on EventSource later.
But for now you can see the magic of the evented HTTP stream, the connection is held open until a callback is fired to close the stream.
stream.rb
1234567891011
get'/connect',provides:'text/event-stream'dostream:keep_opendo|out|connections<<out#out.callback on stream close evt. out.callback{#delete the connection connections.delete(out)}endend
Finally, any data this posted to the /push route is pushed out to each connected device.
stream.rb
12345678910
post'/push'doputsparams#Add the timestamp to the notificationnotification=params.merge({'timestamp'=>timestamp}).to_jsonnotifications<<notificationnotifications.shiftifnotifications.length>10connections.each{|out|out<<"data: #{notification}\n\n"}end
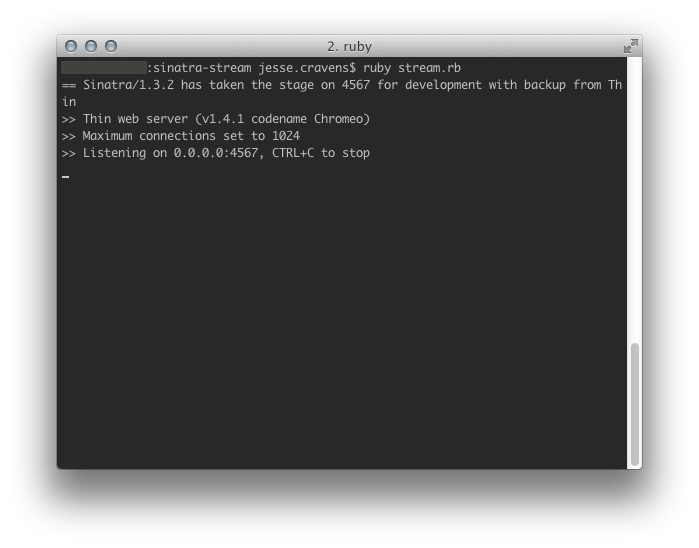
As we said before, you can just follow the instructions at our git repository to pull down and build this code. Or if you have been following along, launch a terminal, navigate to the directory where you code is, and run:
cli
1
$ ruby stream.rb
Figure 9.15 Starting the Sinatra Server
Alright, so now that we have out Sinatra app up and running with custom routes to handle incoming requests from our browser.
If this doesn’t make complete sense yet, just hang loose. In the upcoming subsections, the rest of the items will start to fall into place.
Set Up the HTML pages
We will be building 2 pages: one for the admin to push out notifications, and the other will be for the connected receivers to receive the notification. Both of these ‘views’ will share the same layout, as such:
index.html
1234567891011121314151617
<html><head><title>HTML5 Hacks - Server Sent Events</title><metacharset="utf-8"/><script src=”http://ajax.googleapis.com/ajax/libs/jquery/1/jquery.min.js”></script><script src="http://ajax.googleapis.com/ajax/libs/jqueryui/1/jquery-ui.js"></script><script src="jquery.notify.js"type="text/javascript"></script><linkrel="stylesheet"type="text/css"href="style.css"><linkrel="stylesheet"type="text/css"href="ui.notify.css"></head><body><!—- implementation specific here --></body></html>
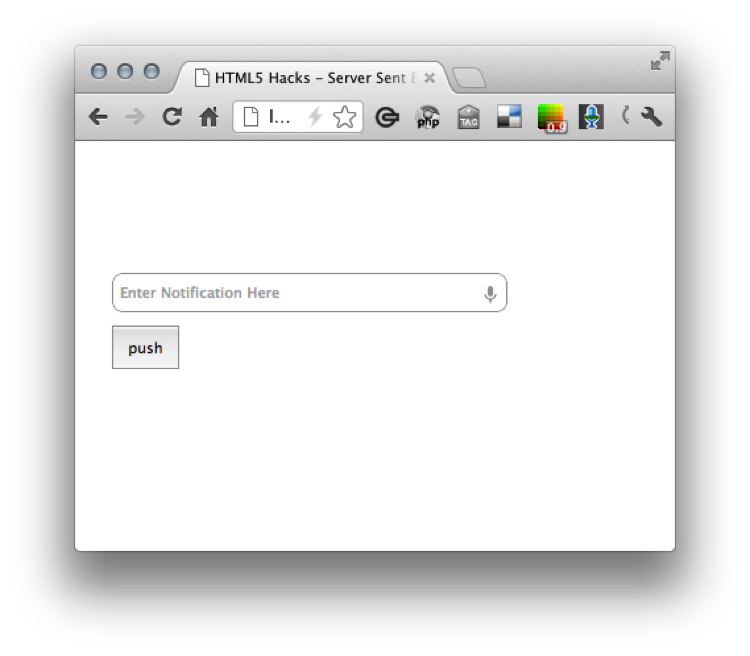
The admin page will contain an input tag and a simple button.
We need to add a bit of JavaScript to attach an event listener to the “send” button. This snippet will prevent the default submission of the form and post the notifcation object to the server as JSON.
Notice the url /push maps to the route we defined in our Sinatra app.
But before we get started, lets set up our EventSource.
EventSource
Event Source is a super simple JavaScript API for opening a connection with an HTTP stream.
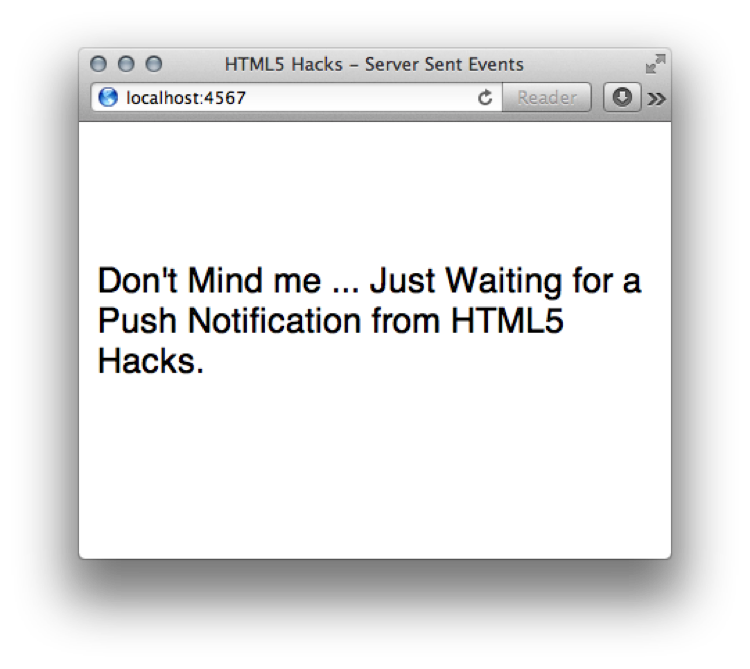
Because our receiver pages are just ‘dumb’ terminals that receive data, we have an ideal scenario for Server Side Events.
Earlier, when we discussed the Sinatra app, we showed exposing a route for the browser to connect to an HTTP stream. Well, this is where we connect!
es.js
1234567
vares=newEventSource('/connect');es.onmessage=function(e){varmsg=$.parseJSON(event.data);// … do something}
Now we can add a simple notification with the available data,
For our Push Notifcations we will make use of Eric Hynds great jQuery plugin jquery-notify, located here at github: [github.com/ehynds/jquery-notify] (https://github.com/ehynds/jquery-notify)
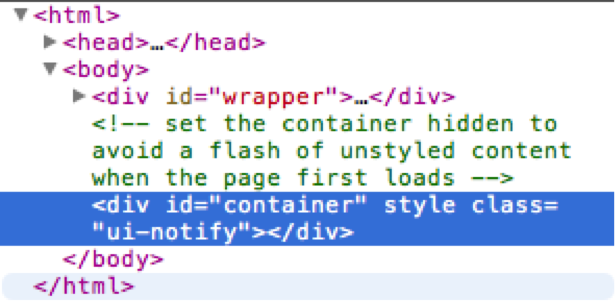
In order to display the notification, we will need to include some markup to the receiver page.
This creates a hidden div tag in the bottom of the document. We are not showing the CSS that uses “display: none” to hide it, but you can see more by examining the source code in the companion git repo.
Figure 9.19 Inspecting the DOM in Chrome Dev Tools
In order for jQuery.notify to initialize, you must first call the following:
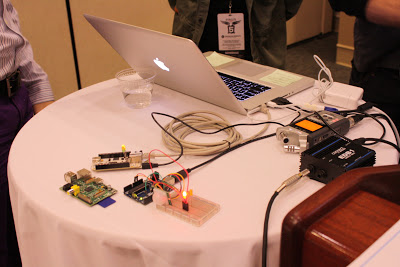
We had a great turnout for the ‘Battle of the HTML5 Hackers’ presentation at SXSWi on Tuesday.
Using our best CDD (Conference Driven Devlopment) techniques, we walked the audience through the creation of Nerdclustr: an HTML5 mobile Application that helps nerds find other like-minded nerds at conferences events.
Using realtime and mapping technolgies, the app visualizes nerd behavior in map pin clusters.
Here is a shot of the app in action (Ballroom G in the Austin Convention Center); it performed well during the presentation. Thanks to Nodjitsu for the quality node.js WebSocket service. After a 2-day hackathon to get the app launched, I ran through a number of deployment options, many of which I have used before for Rails applications. Nodjitsu won out in that it actually supported the WebSokcet protocol and made deployment super simple using the jitsu CLI.
During the book signing, the bookstore informed us there were only 3 copies left. I’m not keen to the selection process of books, but I was little surprised at the limited number of technical books. This is certainly a reflection of the SXSWi demographic, and we also tailored our content and presentation style to this audience.
Embedded JavaScript, HTML5 and the Internet of Things
I had a great time presenting at HTML5.tx 2013; here is an embed above of the slide deck. I should have the trailr node module in a presentable format soon and I’ll tweet its inclusion in NPM. I have a placeholder here: trailr at npm
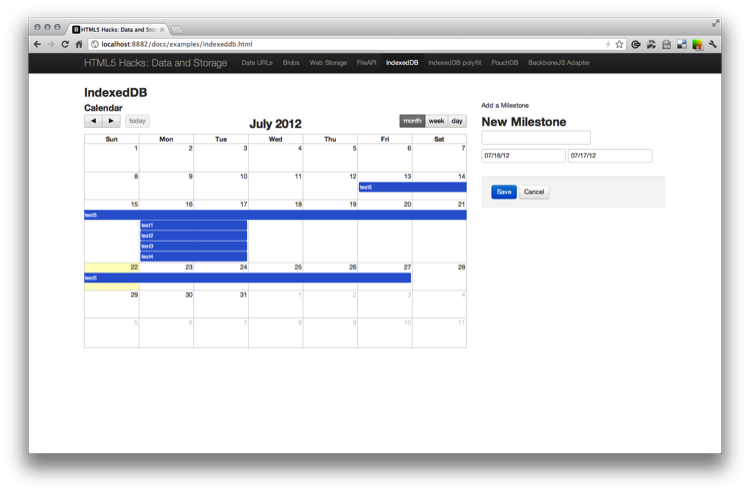
IndexedDB is a persistent object data store in the browser. Although it is not a full SQL implementation and it is more complex than the unstructured key–value pairs in localStorage, you can use it to define an API that provides the ability to read and write key–value objects as structured JavaScript objects, and an indexing system that facilitates filtering and lookup.
For this hack we will use IndexedDB to store milestone objects for a calendar application. The UI will provide a simple means to create a new milestone and provide a title, start date, and end date. The calendar will then update to show the contents of the local data store. Figure 6-8 shows the result.
Figure 6-8. FullCalendar.js and IndexedDB
We need to start by including the markup for the two pieces of the UI: the calendar and the form.
We’ll begin with the form. You may notice that the input fields for the dates include data-date-format attributes. We will use these later for the JavaScript date pickers.
The calendar is provided by FullCalendar.js, a fantastic jQuery plug-in for generating robust calendars from event sources. The library will generate a calendar from a configuration object and a simple div.
simple div
1
<div id='calendar'></div>
And we can’t forget to include a few dependencies:
To improve the user experience, we will also include date pickers for choosing the dates within the form fields for start and end dates (see Figure 6-9).
Figure 6-9. Date pickers
To instantiate the date pickers we will include the following toward the beginning of our script:
Now we will set up a global namespace to hold our code, and set up a public milestones array (within the namespace) to hold our milestones temporarily while we pass them between our database and the FullCalendar API. This should make more sense as you continue to read. While we are at it we will need to normalize our indexedDB variable across all of the vendor-specific properties.
namespace and normalize
1234567891011121314151617181920
var html5hacks = {};

html5hacks.msArray = [];

var indexedDB = window.indexedDB || window.webkitIndexedDB ||
                window.mozIndexedDB;

if ('webkitIndexedDB' in window) {
  window.IDBTransaction = window.webkitIDBTransaction;
  window.IDBKeyRange = window.webkitIDBKeyRange;
}
Now we can begin to set up our database:
html5hacks.indexedDB = {};
html5hacks.indexedDB.db = null;

function init() {
  html5hacks.indexedDB.open();
}

init();
This will obviously fail for now, but as you can see the initialization begins by calling the open() method on an html5hacks.indexedDB. So let’s take a closer look at open():
html5hacks.indexedDB.open = function() {

  var request = indexedDB.open("milestones");

  request.onsuccess = function(e) {
    var v = "1";
    html5hacks.indexedDB.db = e.target.result;

    var db = html5hacks.indexedDB.db;

    if (v!= db.version) {
      var setVrequest = db.setVersion(v);
      setVrequest.onerror = html5hacks.indexedDB.onerror;

      setVrequest.onsuccess = function(e) {
        if(db.objectStoreNames.contains("milestone")) {
          db.deleteObjectStore("milestone");
        }

        var store = db.createObjectStore("milestone",
          {keyPath: "timeStamp"});

        html5hacks.indexedDB.init();
      };
    }
    else {
      html5hacks.indexedDB.init();
    }
  };
  request.onerror = html5hacks.indexedDB.onerror;
}
First, we need to open the database and pass a name. If the database successfully opens and a connection is made, the onsuccess() callback will be fired.
Within the onsuccess, we then check for a version and call setVersion() if one does not exist. Then we will call createObjectStore() and pass a unique timestamp within the keypath property.
Finally, we call init() to build the calendar and attach the events present in the database.
html5hacks.indexedDB.init = function() {

  var db = html5hacks.indexedDB.db;
  var trans = db.transaction(["milestone"], IDBTransaction.READ_WRITE);
  var store = trans.objectStore("milestone");

  var keyRange = IDBKeyRange.lowerBound(0);
  var cursorRequest = store.openCursor(keyRange);

  cursorRequest.onsuccess = function(e) {
    var result = e.target.result;

    if(!result == false){

        $('#calendar').fullCalendar({
          header: {
            left: 'prev,next today',
            center: 'title',
            right: 'month,agendaWeek,agendaDay'
          },
          weekmode: 'variable',
          height: 400,
          editable: true,
          events: html5hacks.msArray
        });

      return;

    }else{

      console.log("result.value" , result.value);
      buildMilestoneArray(result.value);
      result.continue();
    }
  };
  cursorRequest.onerror = html5hacks.indexedDB.onerror;
};
At this point we are poised to retrieve all the data from the database and populate our calendar with milestones.
First, we declare the type of transaction to be a READ_WRITE, set a reference to the datastore, set a keyrange, and define a cursorRequest by calling openCursor and passing in the keyrange. By passing in a 0, we ensure that we retrieve all the values greater than zero. Since our key was a timestamp, this will ensure we retrieve all the records.
Once the onsuccess event is fired, we begin to iterate through the records and push the milestone objects to buildMilestoneArray:
buildMilestoneArray()
1234567891011121314151617
function buildMilestoneArray(ms) {
  html5hacks.msArray.push(ms);
}
When we reach the last record, we build the calendar by passing a configuration object to fullCalendar() and returning:
        $('#calendar').fullCalendar({
          header: {
            left: 'prev,next today',
            center: 'title',
            right: 'month,agendaWeek,agendaDay'
          },
          weekmode: 'variable',
          height: 400,
          editable: true,
          events: html5hacks.msArray
        });

      return;
Adding Milestones
Now that we are initializing and building our calendar, we need to begin adding milestones to the database via the form. First let’s use jQuery to set up our form to pass a serialized data object to addMilestone() on each submission:
form submit
1234567
$('form').submit(function() {

    var data = $(this).serializeArray();

    html5hacks.indexedDB.addMilestone(data);
    return false;
  });
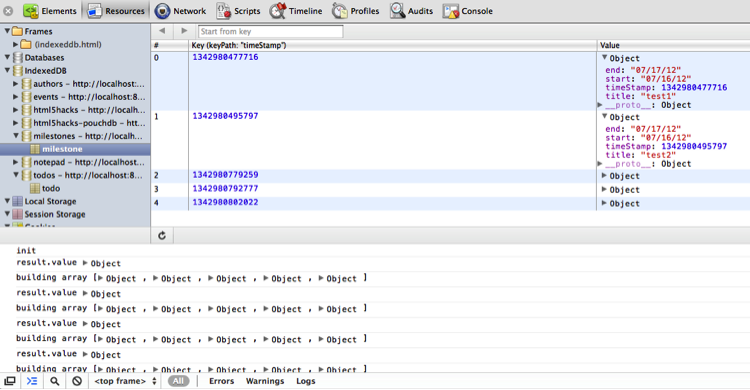
Now let’s submit a few events and then view them in the Chrome Inspector to ensure they are there (see Figure 6-10).
Figure 6-10. Viewing milestone objects in the Chrome Inspector
Let’s take a closer look at our addMilestone method:
addMilestone()
1234567891011121314151617181920212223
html5hacks.indexedDB.addMilestone = function(d) {
  var db = html5hacks.indexedDB.db;
  var trans = db.transaction(["milestone"], IDBTransaction.READ_WRITE);
  var store = trans.objectStore("milestone");

  var data = {
    "title": d[0].value,
    "start": d[1].value,
    "end": d[2].value,
    "timeStamp": new Date().getTime()
  };

  var request = store.put(data);

  var dataArr = [data]
  request.onsuccess = function(e) {
    $('#calendar').fullCalendar('addEventSource', dataArr);
  };

  request.onerror = function(e) {
    console.log("Error Adding: ", e);
  };
};
We established our read/write connection in much the same way as our html5hacks.indexedDB.init(), but now, instead of only reading data, we write a data object to the data store each time by calling store.put() and passing it data. On the onsuccess we then can call fullcalendar’s addEventSource() and pass it the data wrapped in an array object. Note that it is necessary to transform the data object into an array since that is what the FullCalendar API expects.
Im giving a talk at Devcon 5 – San Francisco this afternoon: Client/Server 3.0: 6 Ways JavaScript is Revolutionizing the Client/Server Relationship. Here is the other talks on the agenda: Devcon 5 – San Francisco.
Here is a brief summary:
1 Device Access Within the Browser
The client gets smarter.
JavaScript Device APIs continue to evolve, allowing more access to device hardware, services and applications such as the camera, microphone, system sensors, native address books, calendars and native messaging applications.
We will explore examples utilizing GeoLocation API, and Device Orientation.
2 Client Side Processing w/ Background Threads
The modern web browser’s runtime is a single threaded, event loop. Asynchronous programming models, reactionary systems design actually benefit from this architecture. Maturing interpreters improve performance. Web Workers API enables background threads in the browser, making heavy computations realistic.
So, the client gets more powerful, and becomes an application development evnvironment.
We will explore Web Workers processing heavy computations without blocking the UI for further user interaction.
3 Device Detection and Descriptors / Adaptive Frameworks
Responsive Web Design is great, but it often isn’t enough for larger applications, and applications that need to reach a highly fragmented device market. Adaptive frameworks use DDRs (Device Description Repositories)
We will explore a framework that mixes the best of Responsive with the best of Adaptive: responderJS.
4 HTML5 Connectivity Revolution and HTTP 2.0
Peter Lubbers coined the term, HTML5 Connectivity Revolution, to describe the next level, web network technologies such as: Web Sockets API, XHR2, Event Source and Server Sent Events, SPDY, CORS.
Engage in a demo of robodeck, a Web Socket driven Collaborative presenations framework.
5 Single Runtime, Shared Syntax … the right way
Node.js has enabled the same language, single runtime. But, the paradigms are still quite different. Node streams, inspired by Linux pipes, make IO easy and intuitive. Explore pipe(), pump(), and events in Node streams.
Solutions like Browserify, help bring Node.js libraries and NPM dependency management to the browser. Next up, Domnode, wrapping common, client-side, I/O bound APIs (XHR, SSE, WebRTC, etc.) in Node streams syntax.
6 Embedded JavaScript
With Node.js, Angstrom Linux, and cloud document stores like MongoDB, the server is now embedded in the microcontroller client.
We will explore Arduino wrappers, and Node.js running on the Beaglebone from Texas Instruments.
The combination of Linux and JavaScript open worlds of opportunity.
Here is the node.js server used on the Beaglebone in the demo: beagleserver.
The Johnny Five code is located here: node-embedded
Cross-Origin Resource Sharing (CORS) is a specification that allows applications to
make requests to other domains from within the browser. With CORS you have a secure
and easy-to-implement approach for circumventing the browser’s same origin
policy.
In this hack we will explore hosting a web font on a cloud drive. In order to do so, we
will learn how to configure an Amazon S3 bucket to accept requests from other domains.
If you are not already familiar with web fonts and @font-face, refer to Hack #12.
In the next section I provide a bit more background on Amazon S3 and the same origin
policy, before we get into the details of CORS.
What Is an Amazon S3 Bucket?
Amazon S3 (Simple Storage Service) is simply a cloud drive. Files of all kinds can be
stored using this service, but web application developers often use it to store static
assets such as images, JavaScript files, and stylesheets.
For performance improvements, web developers like to employ Content Delivery Networks
(CDNs) to serve their static files. While Amazon S3 is not a CDN in and of itself,
it’s easy to activate it as one by using CloudFront.
A bucket refers to the directory name that you choose to store your static files.
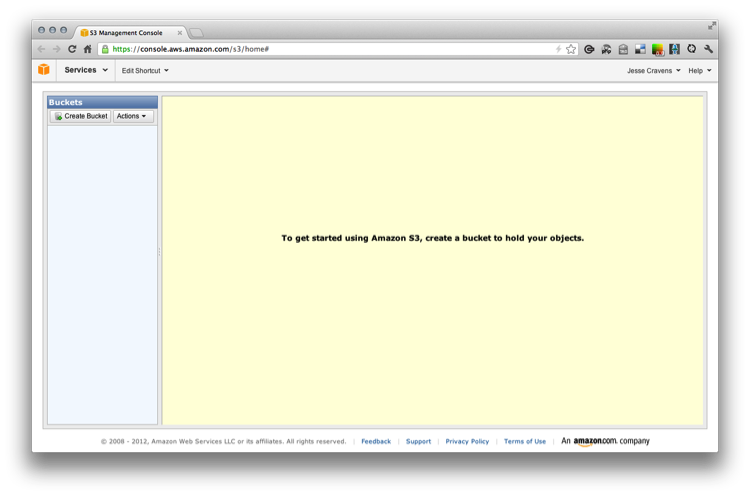
To get started let’s set up an account at Amazon and navigate to the Amazon Management
Console; see Figure 9-21.
Figure 9-21. S3 Management Console
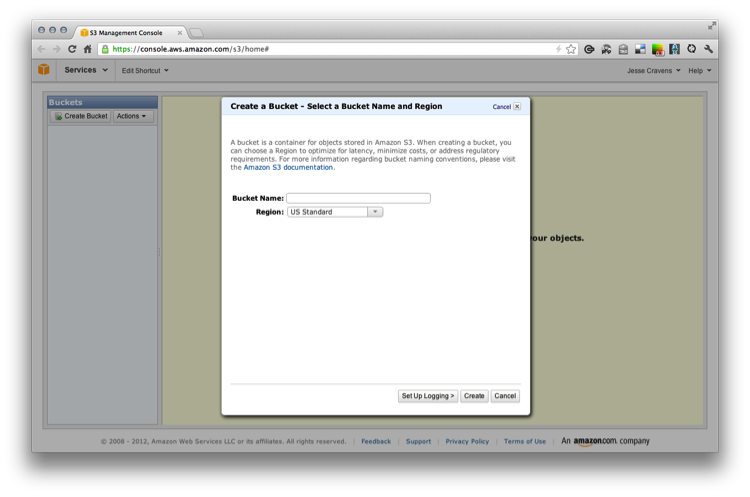
If we click on Create a Bucket we should see the prompt shown in Figure 9-22.
Figure 9-22. Creating an S3 bucket in the S3 Management Console
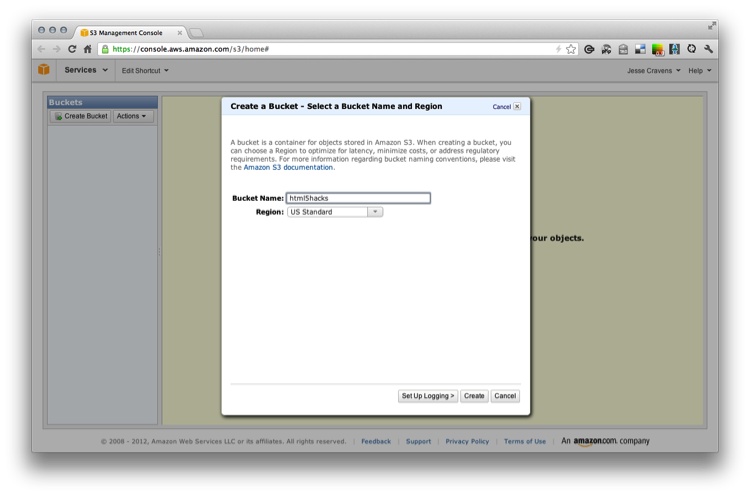
Let’s name the bucket and choose a region (see Figure 9-23). As I stated earlier, you
can choose a region to optimize for latency, minimize costs, or address regulatory
requirements.
Figure 9-23. Naming an S3 bucket in the S3 Management Console
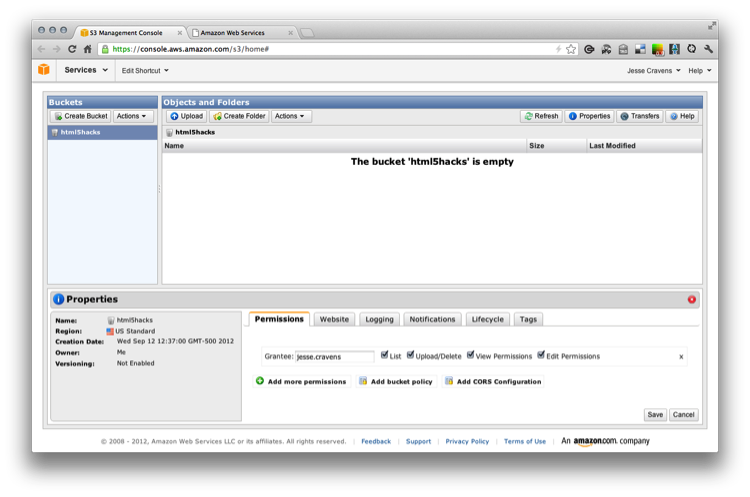
We will go ahead and name our bucket none other than “html5hacks.” You should now
see an admin screen that shows an empty filesystem (see Figure 9-24).
Figure 9-24. The html5hacks S3 bucket
Well, that was simple. So why are we doing this? Let’s start with some simple browser
security—something called the same origin policy.
Same Origin Policy
As the browser becomes more and more of an application platform, application developers
have compelling reasons to write code that makes requests to other domains
in order to interact directly with the content. Wikipedia defines same origin policy as
follows:
In computing, the same origin policy is an important security concept for a
number of browser-side programming languages, such as JavaScript. The
policy permits scripts running on pages originating from the same site to
access each other’s methods and properties with no specific restrictions,
but prevents access to most methods and properties across pages on different
sites.1
As stated in Wikipedia’s definition, the same origin policy is a good thing; it protects
the end user from security attacks. But it does cause some challenges for web developers.
This is where CORS comes into the picture. CORS allows developers of remote data
and content to designate which domains (through a whitelist) can interact with their
content.
Using Web Fonts in Your Application
There are a number of ways to use a web font within your web pages, such as calling
the @font-face service, bundling the font within your application, hosting the web font
in your own Amazon S3 bucket (more on this later), or converting the file to Base64
and embedding the data inline in a data-uri. By the way, the last technique is similar
to the one outlined in Hack #13.
Each of these techniques has limitations.
When calling the @font-face service you are limited to the fonts within the particular
service’s database.
Bundling the font within your application does not make use of HTTP caching, so
your application will continue to download the font file on every page request.
Furthermore, you cannot reuse the font within other applications.
Hosting the font in an Amazon S3 bucket works great, except with Firefox, which
enforces the same origin policy on all resources. So the response from the remote
server will be denied.
Converting the font to Base64 adds additional weight to the stylesheet, and does
not take advantage of caching.
An exploration into the different types of web fonts is beyond the scope of this hack,
so I will assume that you have already selected the web font BebasNeue.otf.
You can download free and open fonts from sites such as http://www.dafont.com.
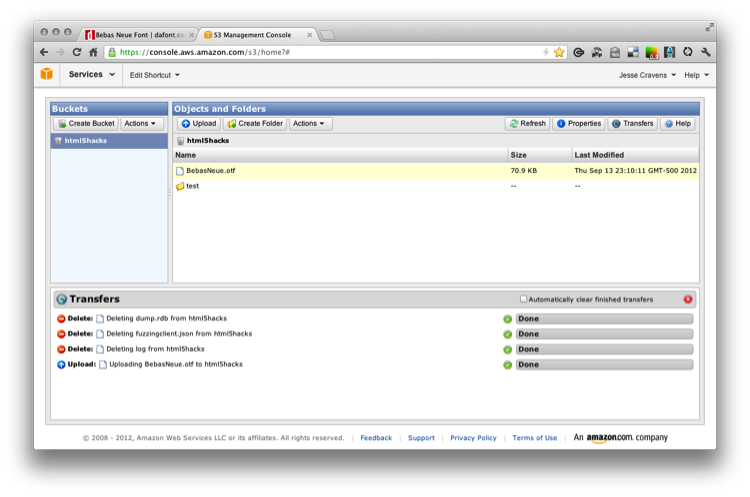
Uploading Your Font to Your Amazon S3 Bucket
Now, all we have to do is to upload the font onto our filesystem in the cloud (see
Figure 9-25).
Figure 9-25. An uploaded BebasNeue font
Adding the Web Font to Your Web Page
In order to add a web font to our page, we need to add a single stylesheet to an HTML
page.
Here is our page. Let’s call it index.html, and add a tag pointing to our base
stylesheet, styles.css.
Now we’ll open a browser and point to our newly created HTML page. In Opera (see
Figure 9-26), Safari, and Chrome our header tag is being styled correctly.
Figure 9-26. Opera browser showing the BebasNeue font
But if we view it in Firefox, we are having issues (see Figure 9-27).
Figure 9-27. Firefox browser failing to show the BebasNeue font
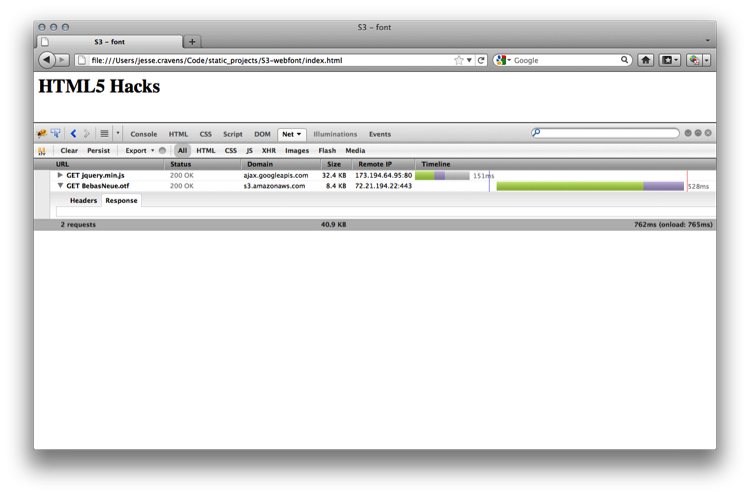
If we examine the request for our font in the Chrome Dev Tools Network tab, we will
see that the response from the server is empty (see Figure 9-28).
Figure 9-28. Firefox browser showing an empty response
What gives? Well, by default, Firefox will only accept links from the same domain as
the host page. If we want to include fonts from different domains, we need to add an
Access-Control-Allow-Origin header to the font.
So, if you try to serve fonts from any CDN, Firefox will not load them.
What Is CORS?
The CORS specification uses the XMLHttpRequest object to send and receive headers
from the originating web page to a server that is properly configured in order to
enable cross-site requests.
The server accepting the request must respond with the
Access-Control-Allow-Origin header with either a wildcard (*) or the correct
origin domain sent by the originating web page as the value. If the value is not included,
the request will fail.
Furthermore, for HTTP methods other than GET or POST, such as PUT, a preflight request
is necessary, in which the browser sends an HTTP OPTIONS request to establish
a handshake with the server before accepting the PUT request.
Fortunately, after enough backlash from the development community, Amazon made
CORS configuration available on Amazon S3 via a very simple XML configuration.
Let’s get started.
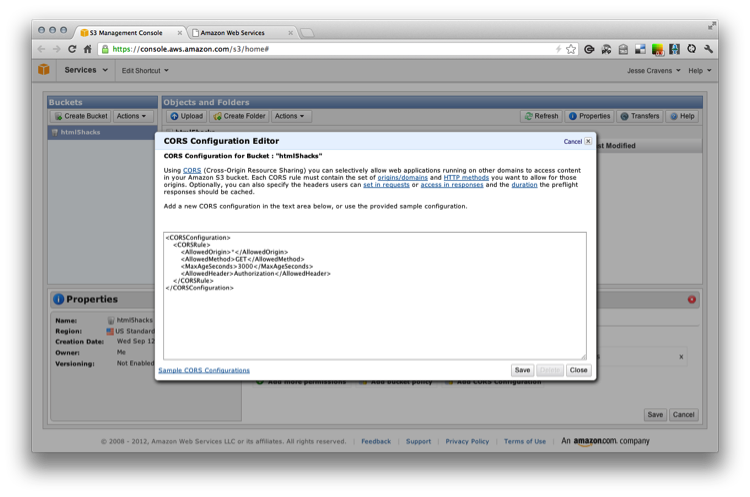
Configuring CORS at Amazon S3
You should already be at your Amazon Management Console at http://
console.aws.amazon.com. Click on Properties→Permissions→Edit CORS configuration,
and you should receive a modal prompt.
The configuration can accept up to 100 rule definitions, but for our web font we will
only need a few. For this example we will use the wildcard, but if you are doing this in
production, you should whitelist the domains to prevent others from serving your font
from your S3 account on their own web pages. It wouldn’t be the end of the world, but
it might get costly.
The first rule allows cross-origin GET requests from any origin. The rule also allows all
headers in a preflight OPTIONS request through the
Access-Control-Request-Headers header. In response to any preflight OPTIONS
request, Amazon S3 will return any requested headers.
The second rule allows cross-origin GET requests from all origins. The * wildcard
character refers to all origins.
So, let’s add our new configuration to our Editor and save (see Figure 9-29).
Figure 9-29. Configuring CORS in the S3 Management Console
Now, let’s return to Firefox and reload the page. We should now see the header font
styled with our BebasNeue web font, as shown in Figure 9-30.
Figure 9-30. Firefox browser successfully showing the BebasNeue font
There is much more to learn about CORS, most notably, HTTP POST usage with certain
MIME types, and sending cookies and HTTP authentication data with requests if so
requested by the CORS-enabled server. So get out there and starting creating your
own CORS hacks.
I’m getting ready for an upcoming talk titled: Rapid Prototyping HTML5 Applications with NodeJS, which I will presenting at Devcon 5 – Austin.
Here is a brief summary:
With HTML5, the modern web browser continues to mature as a capable application platform.
The new specifications are broad, impacting nearly every technology associated with modern web development including graphics, connectivity, client-side storage, offline access, graphics, multimedia, and performance.
JavaScript continues to be front and center as the core language. NodeJS extends JavaScript’s event loop paradigm to the server, and provides JavaScript engineers with the ability to produce functionality deeper in the software stack. This phenomenon has had an impact on types of software development ranging from full-scale, enterprise, mobile applications to robot hobbyists platforms.
See innovative example solutions and learn why NodeJS is an ideal development platform for the production acceleration of next-generation HTML5 applications.
This is the beginning of a transition for me. With the release of HTML5 Hacks, I’m beginning to focus more on my ubiquitous JavaScript content. I’m excited, I have a lot to share.
Look for an update with a web based version of the slides.